
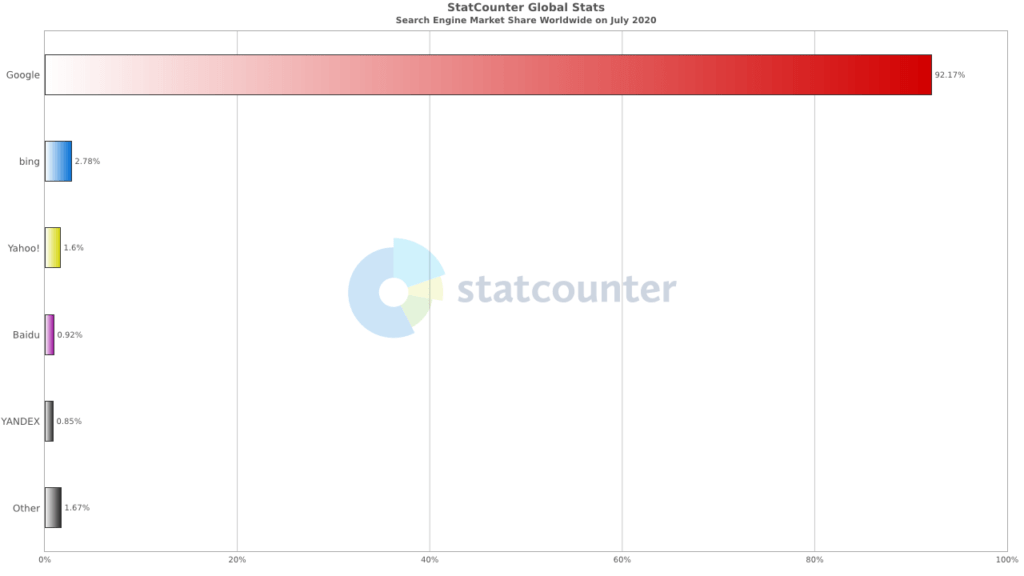
According to Statcounter, Google takes up 92.17% of the world’s search engine market share, followed by Bing.
Source: Statcounter
It makes sense that digital marketers optimize their content for Google. Although content is king in SEO, images contribute equally when it comes to Google ranking. Humans are visual beings. Eye-catching visuals capture our attention and are easier to remember compared to a block of text. Content with images has a higher click-through-rate compared to content without.
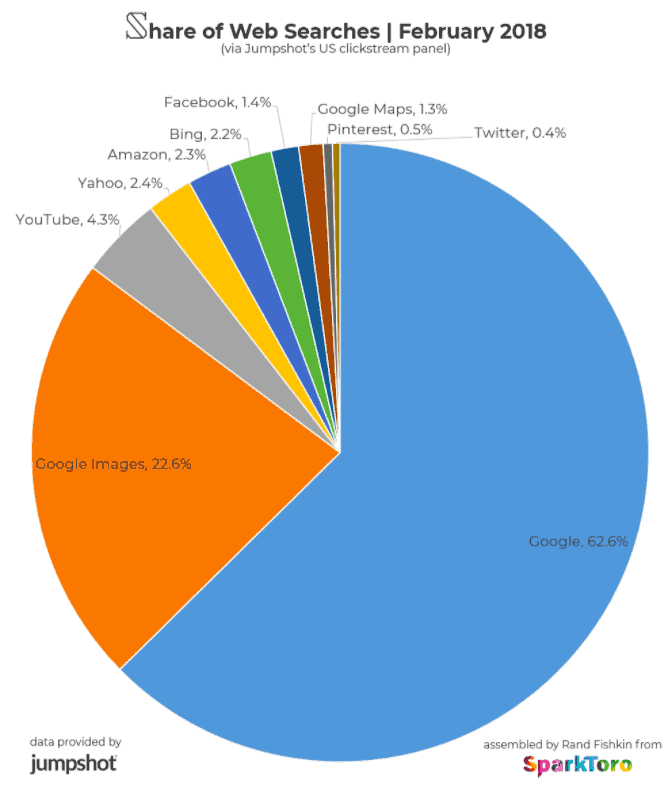
Google knows about this. Almost 22.6% of Google searches happen on Google images.
Source: SparkToro
Since most of our web traffic comes from Google images, it pays to invest in visual content. Optimize your images for SEO to make the most out of your marketing efforts.
These tips will help you optimize your images for SEO and stay on top of search ranking.
1. Be Cautious Of Copyright
If you’re adding images on your page, make sure they don’t have copyright issues. Copyright is a type of intellectual property that gives the creator exclusive ownership for their work. It is extended to images, videos, blogs, songs, and more.
If you decide to use images without permission, the owner could potentially file a DMCA (Digital Millennium Copyright Act), with which you would need to comply. To avoid copyright infringement, you must follow these practices to ensure you’re not stealing another person’s work.
Don’t Believe What You Hear
Just because someone said you could share an image on your blog doesn’t mean you should believe them. Always assume that the work is copyrighted. Taking this strict approach to avoid any copyright issue or lawsuit, will serve you well and save you time and money in the long run.
Don’t Use Or Alter Without Seeking Permission
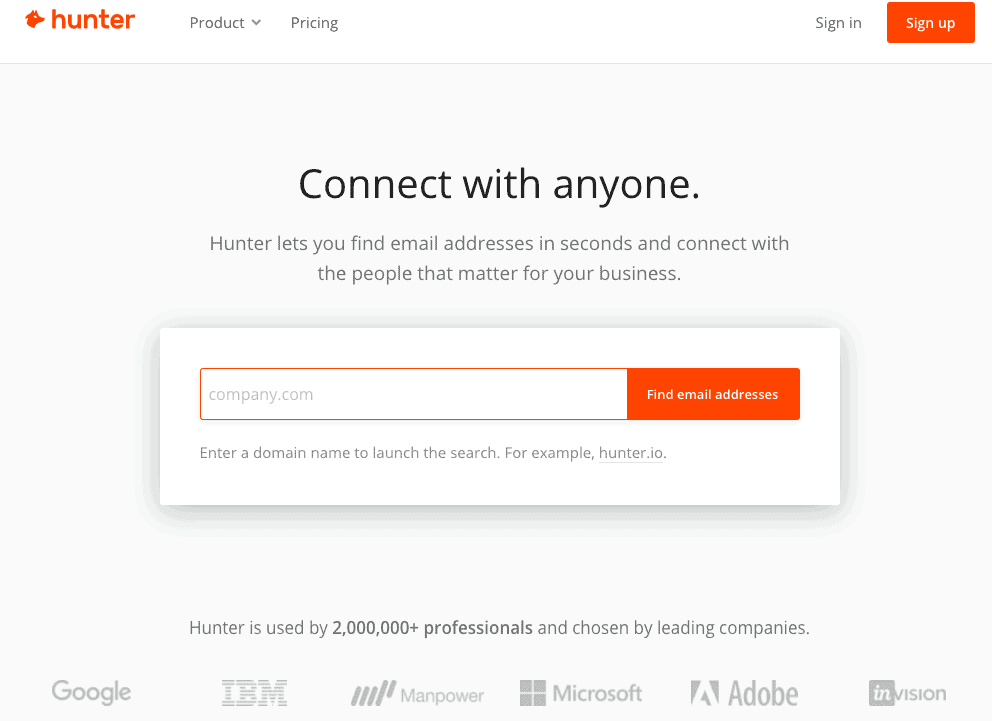
The first step you should do before using any image on the internet is to identify the author. Don’t assume that it is free just because it doesn’t have a copyright symbol. Works from online stock agencies such as Getty Images and Shutterstock are subject to license agreements. Contact them to purchase the license. If the image is not from a stock agency, use Hunter.io to find the author’s email address. The author needs to be contacted for permission to use their work.
Look For Fair Use Images
It’s always best to look for fair use or a stock image. These are pictures that allow you to modify and publish as long as you respect the creators’ wishes. Many sites provide free stock images for your blog. Here are some popular examples:
1. Pexels
Pexels provides a themed collection of royalty-free images that you can download and edit. The photos have excellent quality and the site grows by ten new high-quality photos per day.

2. Pixabay
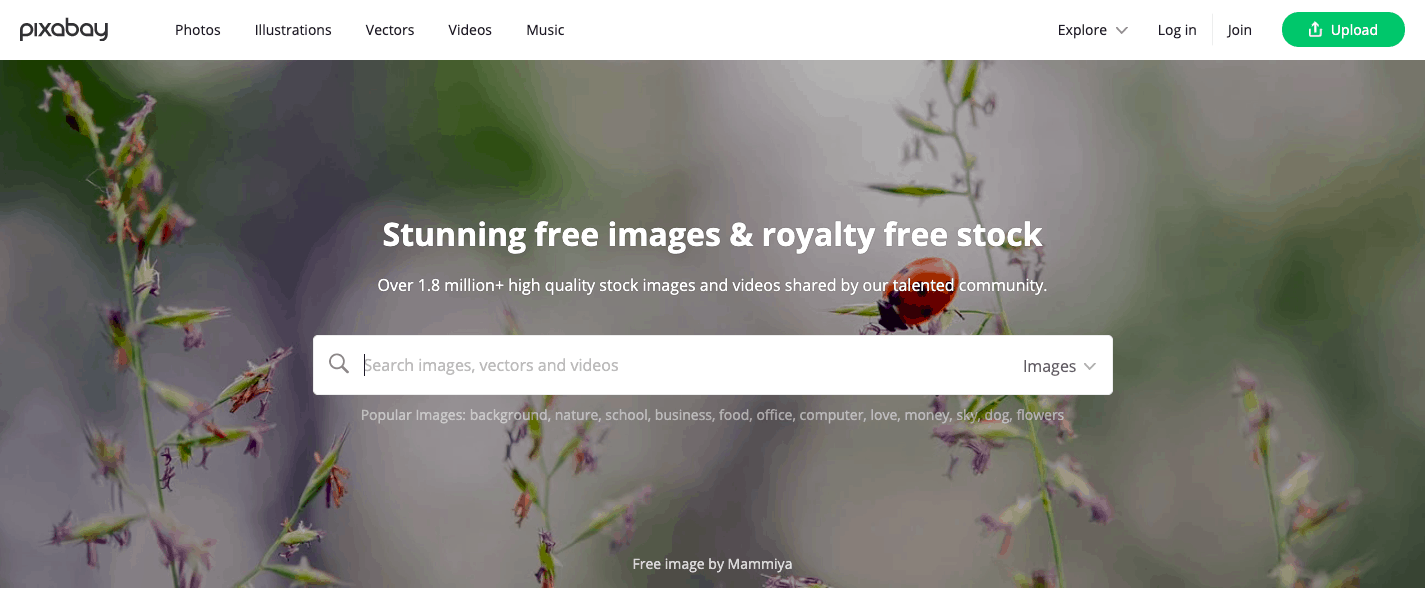
Pixabay hosts over 1.8 million stunning free images you can use anywhere. They are free for commercial use, and authorship attribution is not required.
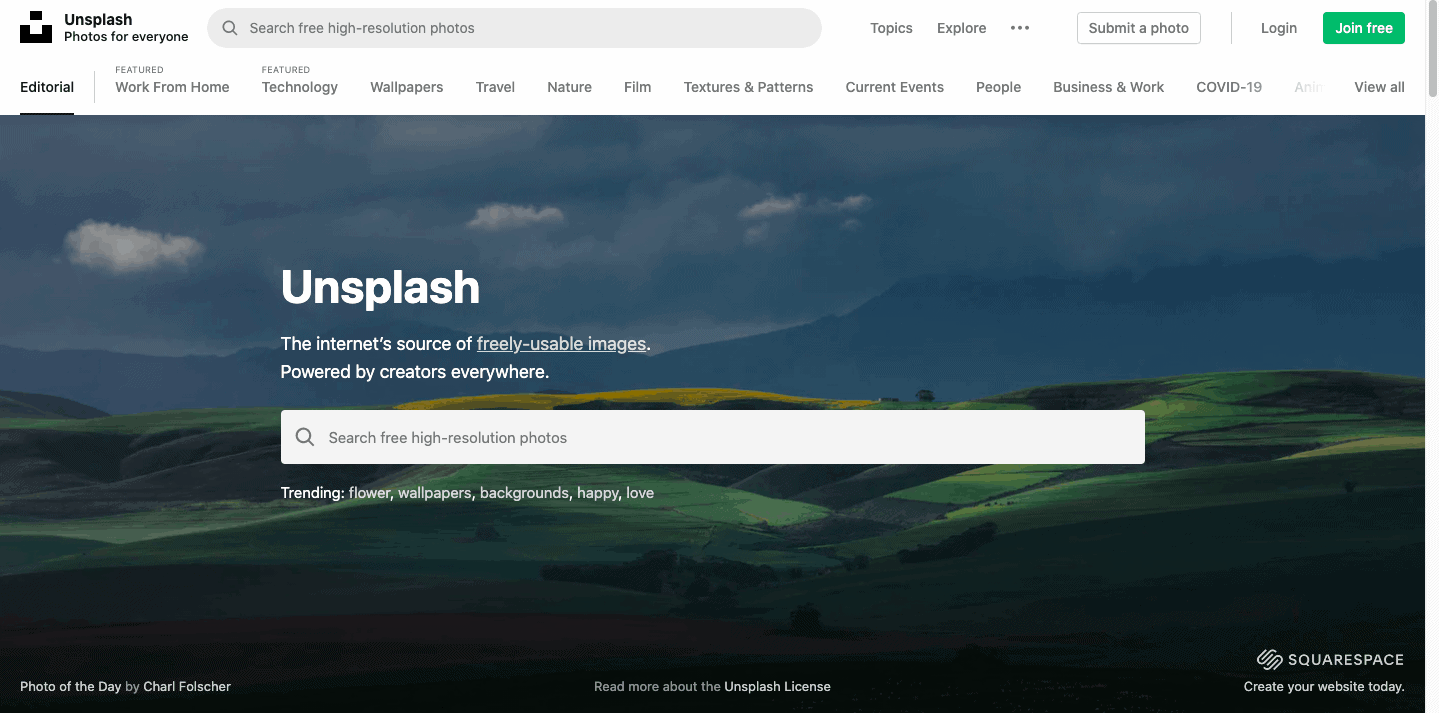
3. Unsplash
Unsplash is a photo discovery platform for free to use, high definition images. It was founded 3 years ago as a humble Tumblr blog but has now grown into an industry-leading photography platform, with over 1 million stock images from which to choose.
2. Create Unique Images
It takes a lot of time to create a blog post—and even more time to get people to read and interact with your work. Yet many blog writers still neglect the simple hack to increase their readership.
While there are countless resources for ready-to-use images, creating unique images has proven beneficial in SEO. Here are a few reasons:
- Too many websites are cluttered with the same generic stock photo. Anyone can buy a stock photo for less than a dollar, which means many of these images appear on the internet hundreds of times. While you may have it optimized, it may not have the same impact as an original, high-quality image.
- People are more likely to share images that they’ve never seen before, especially on social media. Creating unique images that communicate your message has much more impact than just an aesthetically pleasing blog post.
- It helps build your brand. While you may use stock images, you run the risk of being identified as just another blog. Unique images help your posts stand out from other blogs.
Luckily, visual tools allow you to edit and create beautiful images for different scenarios. Here are some of the best tools you can use to create unique images:
1. Canva
Canva allows you to create all kinds of graphics with drag and drop features. It comes with professional-looking templates. You can also use stock images, icons, effects, and other features.

2. Piktochart
Piktochart is an easy to use infographics maker. Infographics have often proven effective in generating tons of high-quality backlinks that improve your site’s overall SEO. You can also add your graphs, charts, photos, maps, illustrations, and even videos.

3. Choose The Best File Type
After you’ve chosen an image, you have to decide the file type to use. Each file type has its strengths and weaknesses, and it’s essential to keep these in mind. In SEO, page load speed is most crucial. Therefore, your task is to choose the most appropriate type for your images with the least quality reduction.
Here are some common image file types:
- PNG – PNG is great for line drawings, text, etc. It produces better quality images but comes with larger file sizes. It supports numerous colors and transparency.
- JPEG – JPEG is great for photographs and images with lots of colors. If you’re trying to maintain a lot of detail in your image, JPEG is your best option. It will give you good results with relatively small file size. However, if you’re looking for a transparent image, the JPEG is not the best file type to use.
- GIF – GIF is the only file type that supports animation. However, it is limited in terms of color and transparency.
For screenshots, applications that allow you to export multiple formats include:
- Skitch – Skitch is a screen capture tool used to capture partial areas on your desktop. It is a free tool available for Mac and Windows.
- Snipping Tool – It is a Microsoft Windows utility application. It takes screenshots of an entire screen or rectangular area.
- Lightshot – Lightshot tool allows the user to take a screenshot of a selected area. The selected area is resizable and customizable as well.
- Greenshot – It captures a snapshot quickly and easily. The captured image can be saved in various formats for editing at a later stage.
4. Compress Your Images
When optimizing your images for SEO, you’ll want to reduce them to the smallest file possible. Research showed that images comprise 75% of the total page weight. Uncompressed images will slow down web pages, which will lead to higher bounce rates.
To prevent that, use some of these image compressing tools to reduce image size:
- TinyPNG
- Compress JPEG.
- Optimizilla
- Trimage
How To Compress Image Files
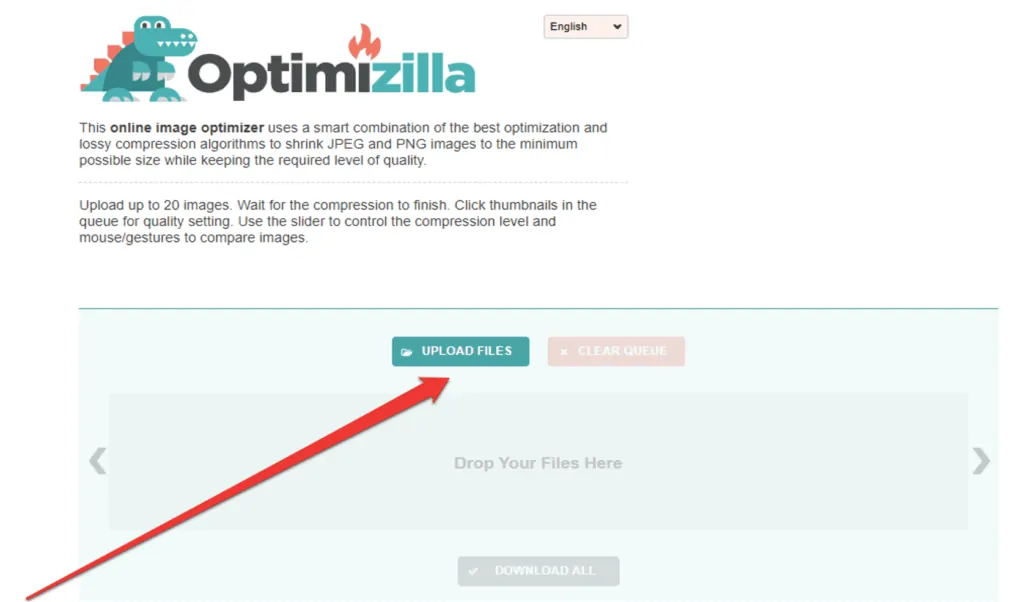
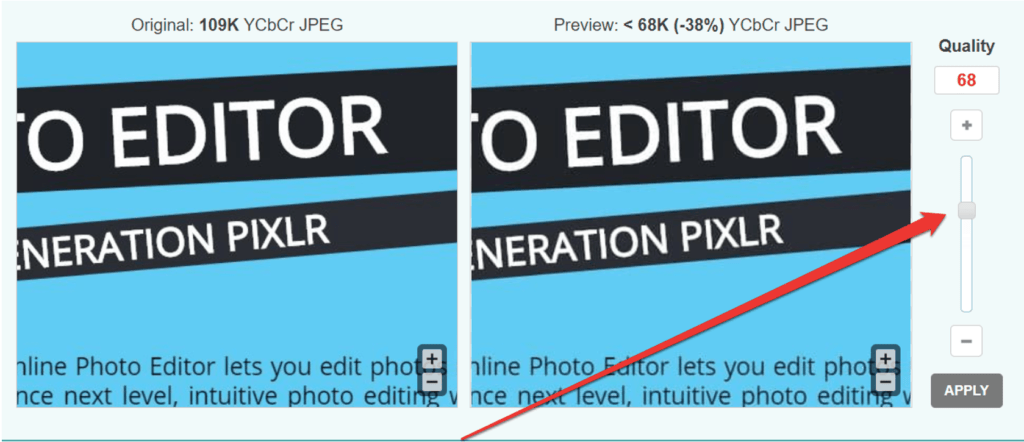
Step 1. Open the image compressor website. We choose Optimizilla to demonstrate this process. This web application allows you to compress up to 20 photos at once.
Step 2. Click upload files, and it will prompt a file explorer.
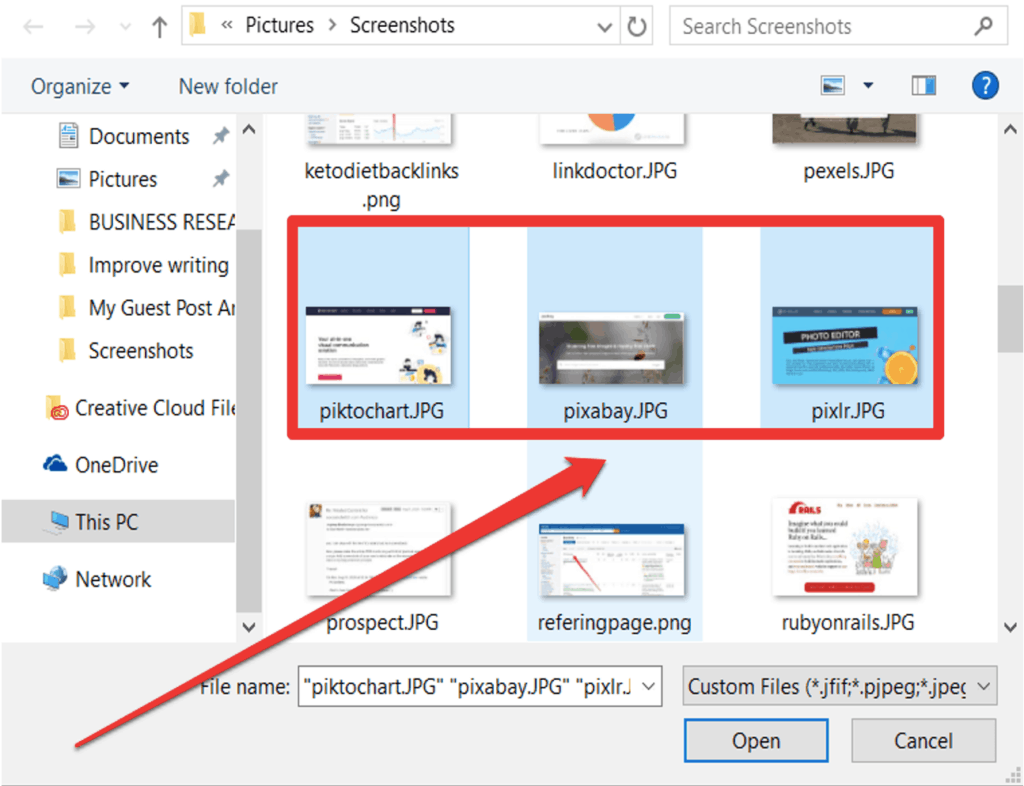
Step 3. Select photos to upload. You can only upload up to 20 photos at a time.
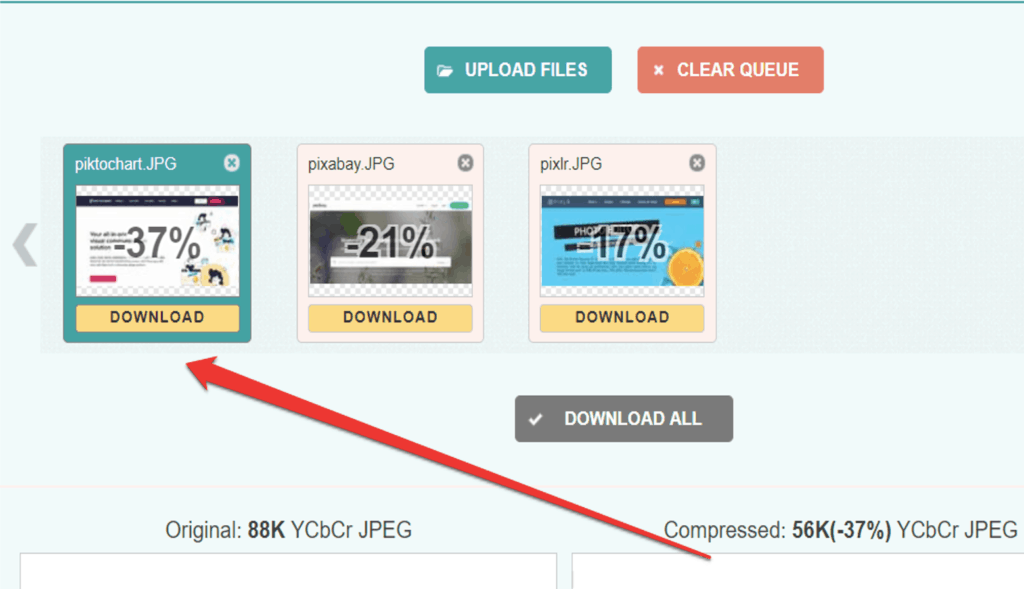
Step 4. Click one of the photos and adjust the photo’s compression by scrolling up and down. Once you’re done, click apply.
Use the PageSpeed Insights tool if you’re unsure how your images affect page speed.
5. Name Your Images Appropriately
It’s easy to scroll through a collection of images and upload one in a blog without caring about the default file names the camera assigns. When it comes to Image SEO, file names are significant. You have to make sure that it contains relevant keywords to help your web page rank in search engines. When you’re creating a file name for images, it should be descriptive and keyword-rich. You want Google and other search engines to know what the image is all about. Take this image, for example.

Source: Unsplash
You should see a generic name assigned to the image. (e.g., DSC3785.jpg). However, if you’re using this image in a blog post, it should be more descriptive. (orange-mountain-bike.jpg)
Don’t use a generic name for the image because it doesn’t help Google understand it, e.g. bicycle.jpg.
More examples:
Bad: dog.jpg
Good: dog-for-sale.jpg
6. Add Exif Data To Images
Exif data (Exchangeable Image File Format) is a standard in adding metadata to images. It contains information about the image after the picture was taken. This includes information such as:
- Images size
- File format
- Geolocation
- Capture date
- Capture time
- Camera properties
- Copyright information, and more.
This information comes in handy since it includes the author and the camera settings. Embedding Exif information enhances the visibility of your site in search engines. In a statement, Google’s Matt Cutts recommends the use of Exif data if it is readily available.
How To View And Edit Exif Data
Step 1. Go to your image folder and select the image for which you want to see the data. Right-click on the image and select properties.
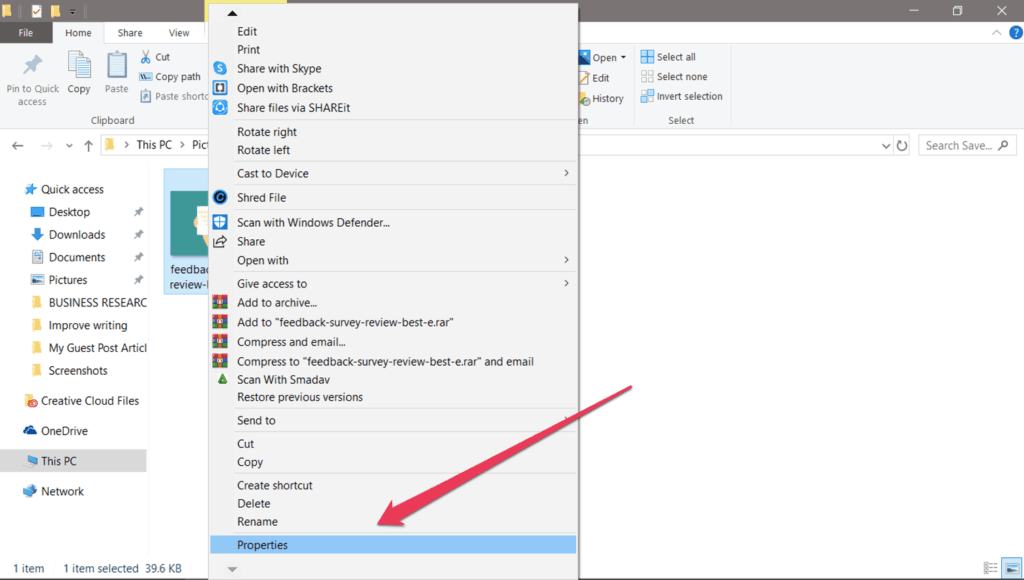
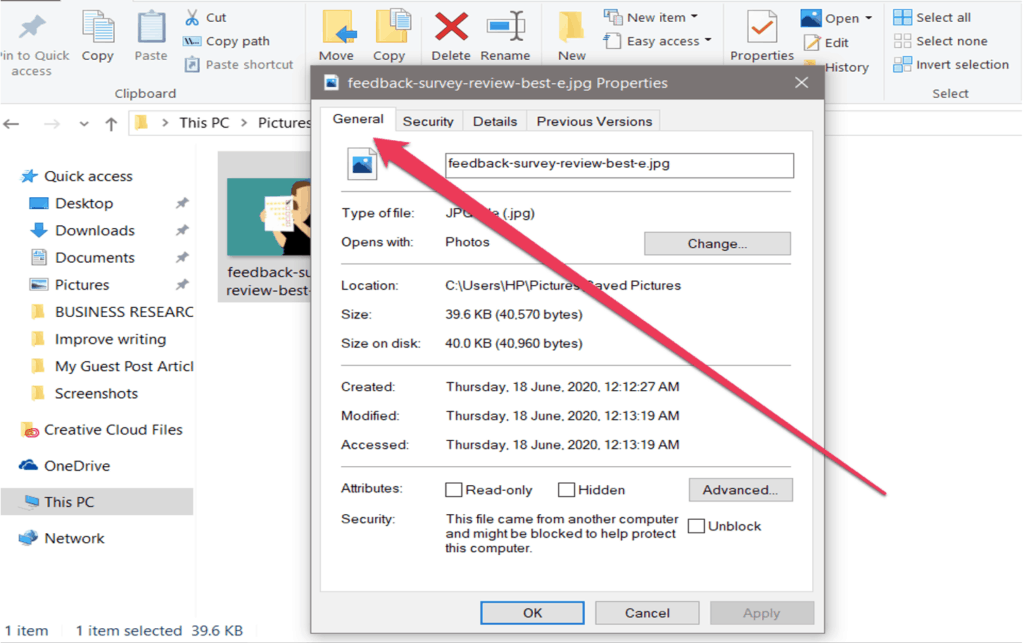
Step 2. After clicking properties, a new window will appear. You should see all the available data from the General tab.
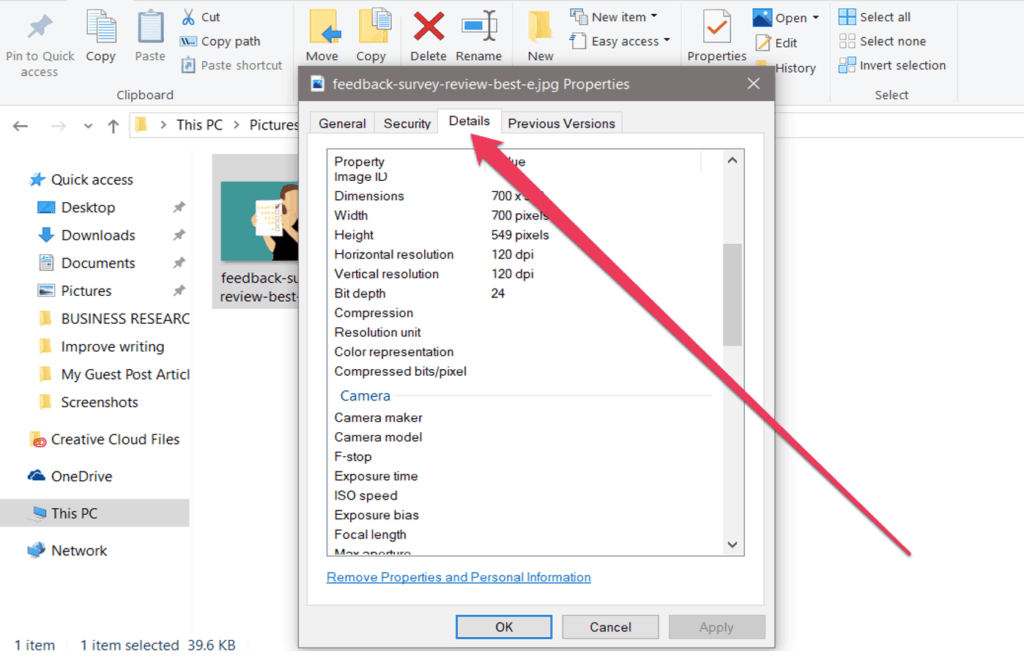
Step 3. For more Exif data, click on the Details tab and then edit. Click Apply once you’re done.
7. Write Descriptive Alt Text
Alt text helps you provide better web accessibility to visually impaired users. In situations where the image fails to load, the Alt text appears instead of the image. This ensures that no information is lost. Google uses Alt text to understand what the image is all about. It is useful as an anchor text if you decide to use an image as a link. If you’re using Alt text for every image you use, make sure it contains a keyword phrase. Avoid keyword stuffing as it may cause your site to be seen as spam.
Google provides an example of the proper use of Alt text.

8. Create An Image Sitemap
An image sitemap provides detailed information about an image. It can include the image subject matter, license, and type. Google encourages marketers to create an image sitemap to give their search engine more information about an image. Search engines read this file so they can intelligently crawl your site. If you have a sitemap on your website, you should add image information to it.
If you’re using a WordPress website, you can use these plugins to create a sitemap:
- Google XML Sitemap for images
- Udinra All Image Sitemap
9. Use CDN
Most websites serve all their files from a single server in a single location. For example, if your website’s server is in the United States, your website will travel faster to people who access it in that location. But it will take a while to reach people accessing it from Spain. Content delivery networks (CDNs) solve the problem of page lag. This is the annoying delay that can occur when you request to load a web page the moment it appears on your computer screen. The delay is affected by many factors. In most cases, however, it is caused by the physical distance between you and the web host’s server. Content delivery networks solve the problem by caching your files across a global network of servers.
Examples of CDN:
- CloudFare
- Incapsula
- Swarmify
- Amazon CloudFront
10. Leverage Browser Caching
Browser caching stores image assets in the browser on the chance that it may be useful later. For instance, if a reader visits your page for the first time, the browser sends a request to the remote server that hosts the site. The server sends back pieces of the website’s assets. Text appears before the images because it is small and takes little time to download. This process takes a lot of bandwidth. Therefore, high-quality images may take several seconds to load and become fully functional. Browser caching improves page speed by storing images in the computer’s hard drive. Once the browser has downloaded the asset, it lives there for some time. When a user re-accesses the site, it will always be easier to retrieve the files than from a remote server.
Image SEO is an element of the on-page which relates to images files. The objective of image SEO is to improve the ranking of a website on Google images search and improve its visibility. So before you upload any image, make sure to follow these tips to improve search engine rankings.


